We first need to have a database up and running to add it to Space Cloud.
This guide assumes that you are using the docker setup of Space Cloud for development/testing environment.
We will be using the add database command of space-cli to spin up a database for us on Docker.
For production environment we recommend using a managed database service.
Just run the following command to spin a database locally on Docker:
space-cli add database <db-type> --alias <alias-name>The <db-type> is postgres for Postgres, mysql for MySQL and mongo for MongoDB.
For example, if you wanted to spin up a Postgres, then your command would have been:
space-cli add database postgres --alias postgresOnce we have started our database, we need to know its IP address. Luckily, the space-cli add database command also creates a usable domain name for the database which is of the following format:
<alias-name>.db.svc.cluster.localFor example, if you had set the --alias to postgres in the add database command, the domain name for your database will translate to:
postgres.db.svc.cluster.localThis domain name is to be used as the hostname in the connection string while adding the database to Space Cloud.
We recommend using a managed database service for production environment like AWS RDS, Google Cloud SQL, Mongo Atlas, etc.
After spinning up a managed database, note down the hostname from their console as it will be used while adding the database to Space Cloud.
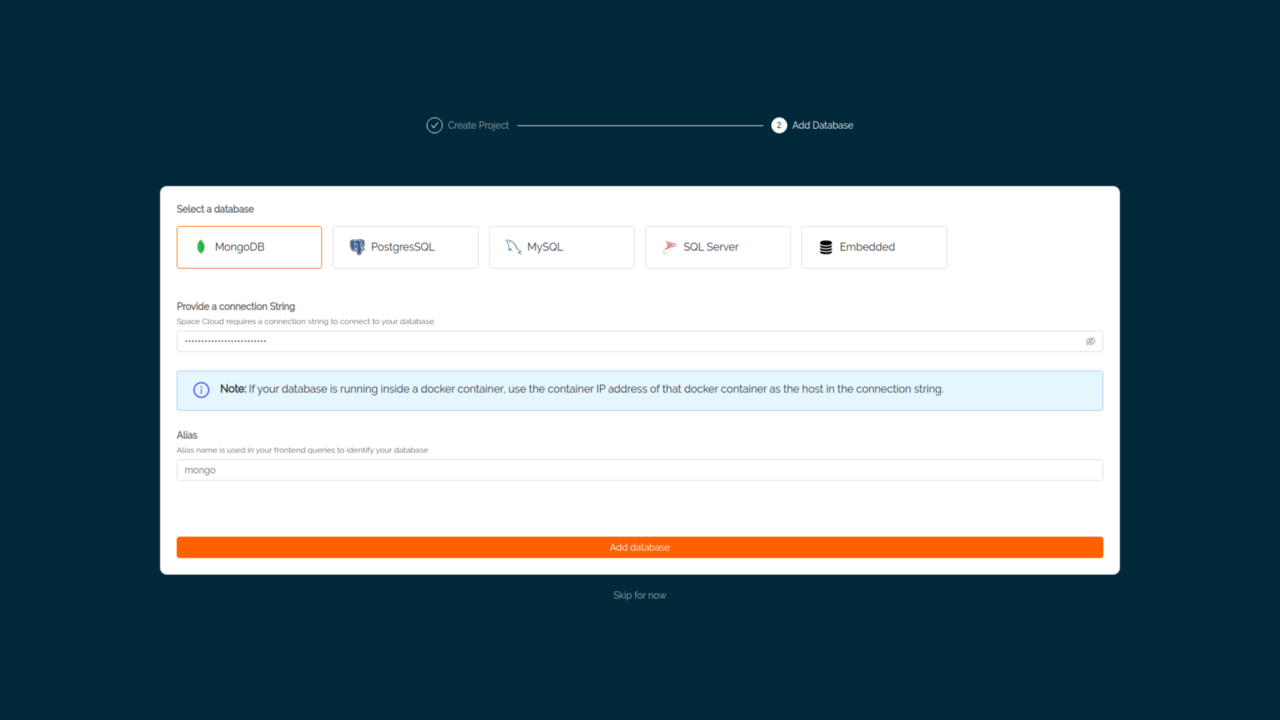
While creating a project, you will be prompted to add a database to your project with the following screen:

You can also add database(s) later to your project. To add a database to your project, you need to go the
Databasesection of that project, click on the database selector/dropdown and then click on theAdd databasebutton to open the screen to add a database.
Select a database that you want to add from the following:
MongoDBPostgreSQLMySQLSQL ServerEmbedded (bbolt db - an embedded document database)Then, provide a connection string for the selected database. The format for the connection string is as follows:
mongodb://<hostname>:<port>This will create a database with the name of <project-id> inside MongoDB.
postgres://<username>:<password>@<hostname>:<port>/<database>?sslmode=disableThis will create a schema with the name of <project-id> inside the specified database.
mysql://<username>:<password>@tcp(<hostname>:<port>)/This will create a database with the name of <project-id> inside MySQL.
Data Source=<host>,1433;Initial Catalog=master;User ID=<username>;Password=<password>@#;Use the hostname obtained earlier in the connection string above.
Then, give your database an alias name. The alias name that you provide here should be used in your GraphQL queries to identify your database (since Space Cloud can work with multiple databases). By default alias name is mongo, postgres, mysql and sqlserver for MongoDB, Postgres, MySQL and SQL Server respectively.
For example, if you change the alias name to mydb, then your GraphQL queries should be updated to include mydb like this:
query {
  pokemon @mydb {
    id
    name
  }
}
Finally, click on the Add database button. That’s it! You have added a new database to Space Cloud! You can now start creating tables and using the auto-generated GraphQL APIs for them.